Charlotte Tilbury has released a sequel to the Instant Eye Palette called the the Stars in your Eyes Palette (SIYEP). You can purchase it here.
I was a massive fan of the Instant Eyes palette, and like the previous palette, it contains 12 shades split into 4 sections. The sections they are divided into give a rough guide on which shadows to pair together. Although that's great for inspo and people who find pairing eyeshadows harder, I tend to do my own thing!
The outer packaging this year, instead of the normal purple CT packaging is so lovely and glittery, and really refreshing to see from CT!


Here are the swatches of the shadows. They swatch SO well. I was most interested to compare the shadows to her previous palette, as CT claims to have new molten formulas for this palette!
One thing I noticed about the previous shadows in the SIYEP, is the mattes are more pigmented with one swatch. With the Instant eye palette, the matte shadows have absolutely ZERO fallout, which is very rare for a palette. Although there's zero fallout, the mattes in that palette can be built up to really nice shades.
But this SIYEP is definitely a new formula. With fallout, comes more pigment, and these palettes definitely have a lot more pigment.
Onto the glitters/shimmers, the shimmers are really creamy and buttery. This palette incorporates glitter shades which are very very similar to the glitters in the quad shades, which is what the Instant Palette was missing. The quad glitter shades are one of my favourite formulas, and this palette has them.
Overall, if you're a fan of CT products, this palette is definitely worth a buy! It has amazing matte shades, really buttery shimmer shades, and incorporates Charlotte's amazing glitter formula, that can be found in the quads!
It is on the pricier side, but if you think about it, you can create loads of looks, from day time neutral looks to full on glam. It's got amazing basic shades, but also some really vibrant shades!
Baking is one of them things where if you aren't a professional make up artist/good at advanced make up skills, it can go horribly wrong. I am definitely absolutely not great at baking.
Baking is basically termed as letting translucent powder set on your face for five to ten minutes, on top of your foundation/concealer, which should hopefully leave your foundation creaseless and flawless.
My make up skills are very amateur. At this point, may I point out, just because you take an interest in products, make up and brands - does not automatically make you great at applying make up.
I don't tend to do incorporate this step into my make up routine, even when wearing heavy make up, as I find my make up just looks heavy/cakey and just not right. I also find depending on which powder you use, translucent powder/even some banana powders which are left to bake can give you ultimate flashback in a photo! I'm sure many of you can relate!
So when I heard of Huda's Easy Bake, I was ready to see if it would be the solution to my baking problems. Huda has simple instructions on the back of the Easy Bake product, which supposedly will make baking easy! You can purchase it here.
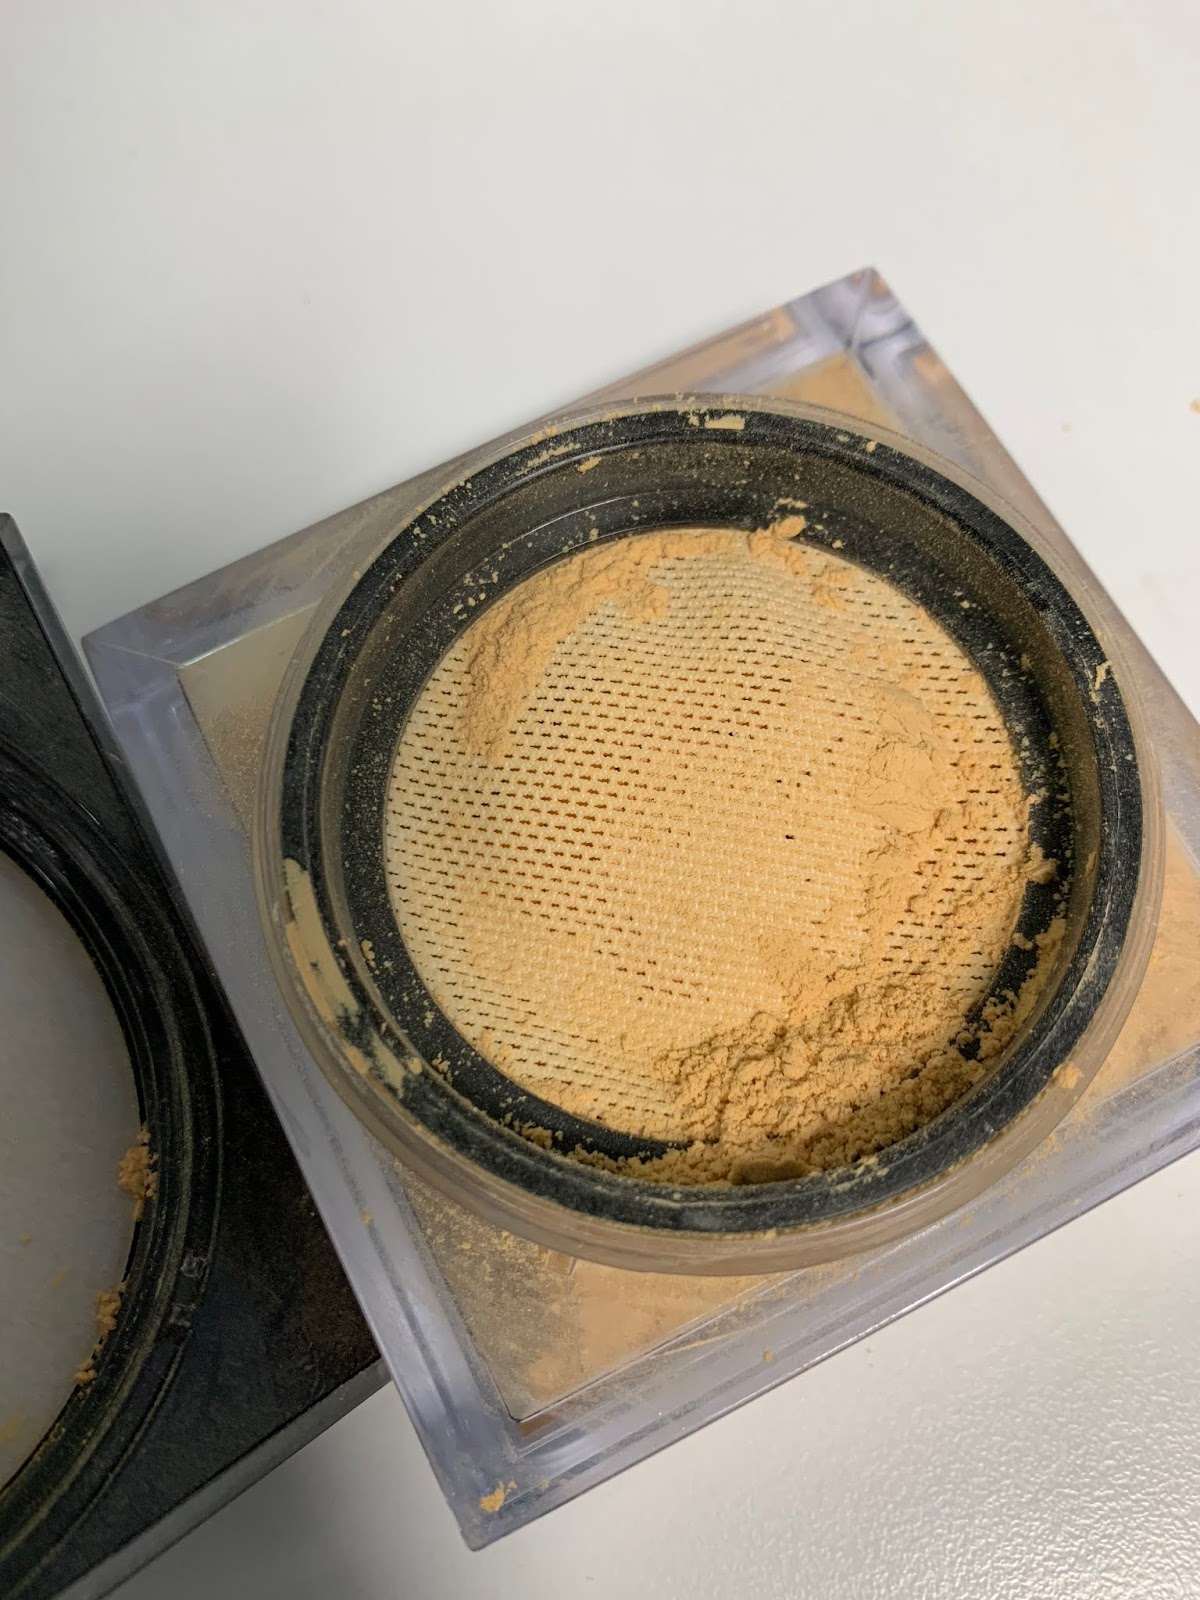
Huda released 8 different shades to this powder, which is pretty great seeing as most brands that bring out powders only range from 1 to 3 different shades. I chose the shade Blondie, which is the fifth darkest shade in the range. In hindsight, I probably could have gotten away with the shade banana bread.
So on the back of the tub, there's some simple instructions.

These instructions are pretty simple and what most people already know about how to bake, if you've ever watched any sort of video of baking.
I also purchased the brush Huda bought out specifically for baking which is linked here.
I started with this brush, and baked. Firstly, the brush is great, but I prefer one side of it more for highlighting rather than just brushing off the excess powder!
Let's move onto the powder. Unfortunately, after I baked, just as the instructions said, I had the same results of any other powder I have ever baked with :(
This powder is VERY a good powder to set your under eye with, but if you don't have good results with baking anyway, this powder will not make you a baking goddess. Rather, I find it easier to just 'set' my undereye/face with this powder, and love the results!
One thing that I find really annoying about this product, is the net over the powder! I understand it was placed there to distribute the powder, but I just don't feel like enough powder comes out for me to bake with! So i'm constantly turning the tub upside down and shaking for powder to come to the top! This also makes it hard if I'm trying to use a beauty blender with the product, so may end up just tearing this net off to reach the product better!
The shade I have is pretty good, however if I wanted to use it as an overall face powder, I'd probably repurchase in a lighter shade, as this shade in particular does give off a yellow vibe. I'll probably try pound cake next time.
Another advantage to this powder guys! NO FLASHBACK!
A few things I have learnt about why baking in general probably doesn't work for me:
- My undereyes aren't as hydrated as they could be! A lovely lady at the Charlotte Tilbury counter explained your undereyes should be completely hydrated before baking.
- I don't wear enough concealer under my eyes. I suppose baking would work if you wear heavy concealer under your eyes that need setting and needs drying because you have so many layers on. I'm quite happy with just one layer of concealer under my eyes and to just set it with powder. So by the time I get to baking, my concealers already dry and set!
- I'm shit at it.
Overall, this powder is a VERY good powder in general, but if you're not great at baking, it's not gonna teach you how to bake 'easily'. For all you professional bakers, I think you'd love this! It sets amazingly, the shade range is great, lasts for many hours and no flashback! Yay.
Let me know if you've used this and if you have any tips for me when you bake! I'd love to hear them.
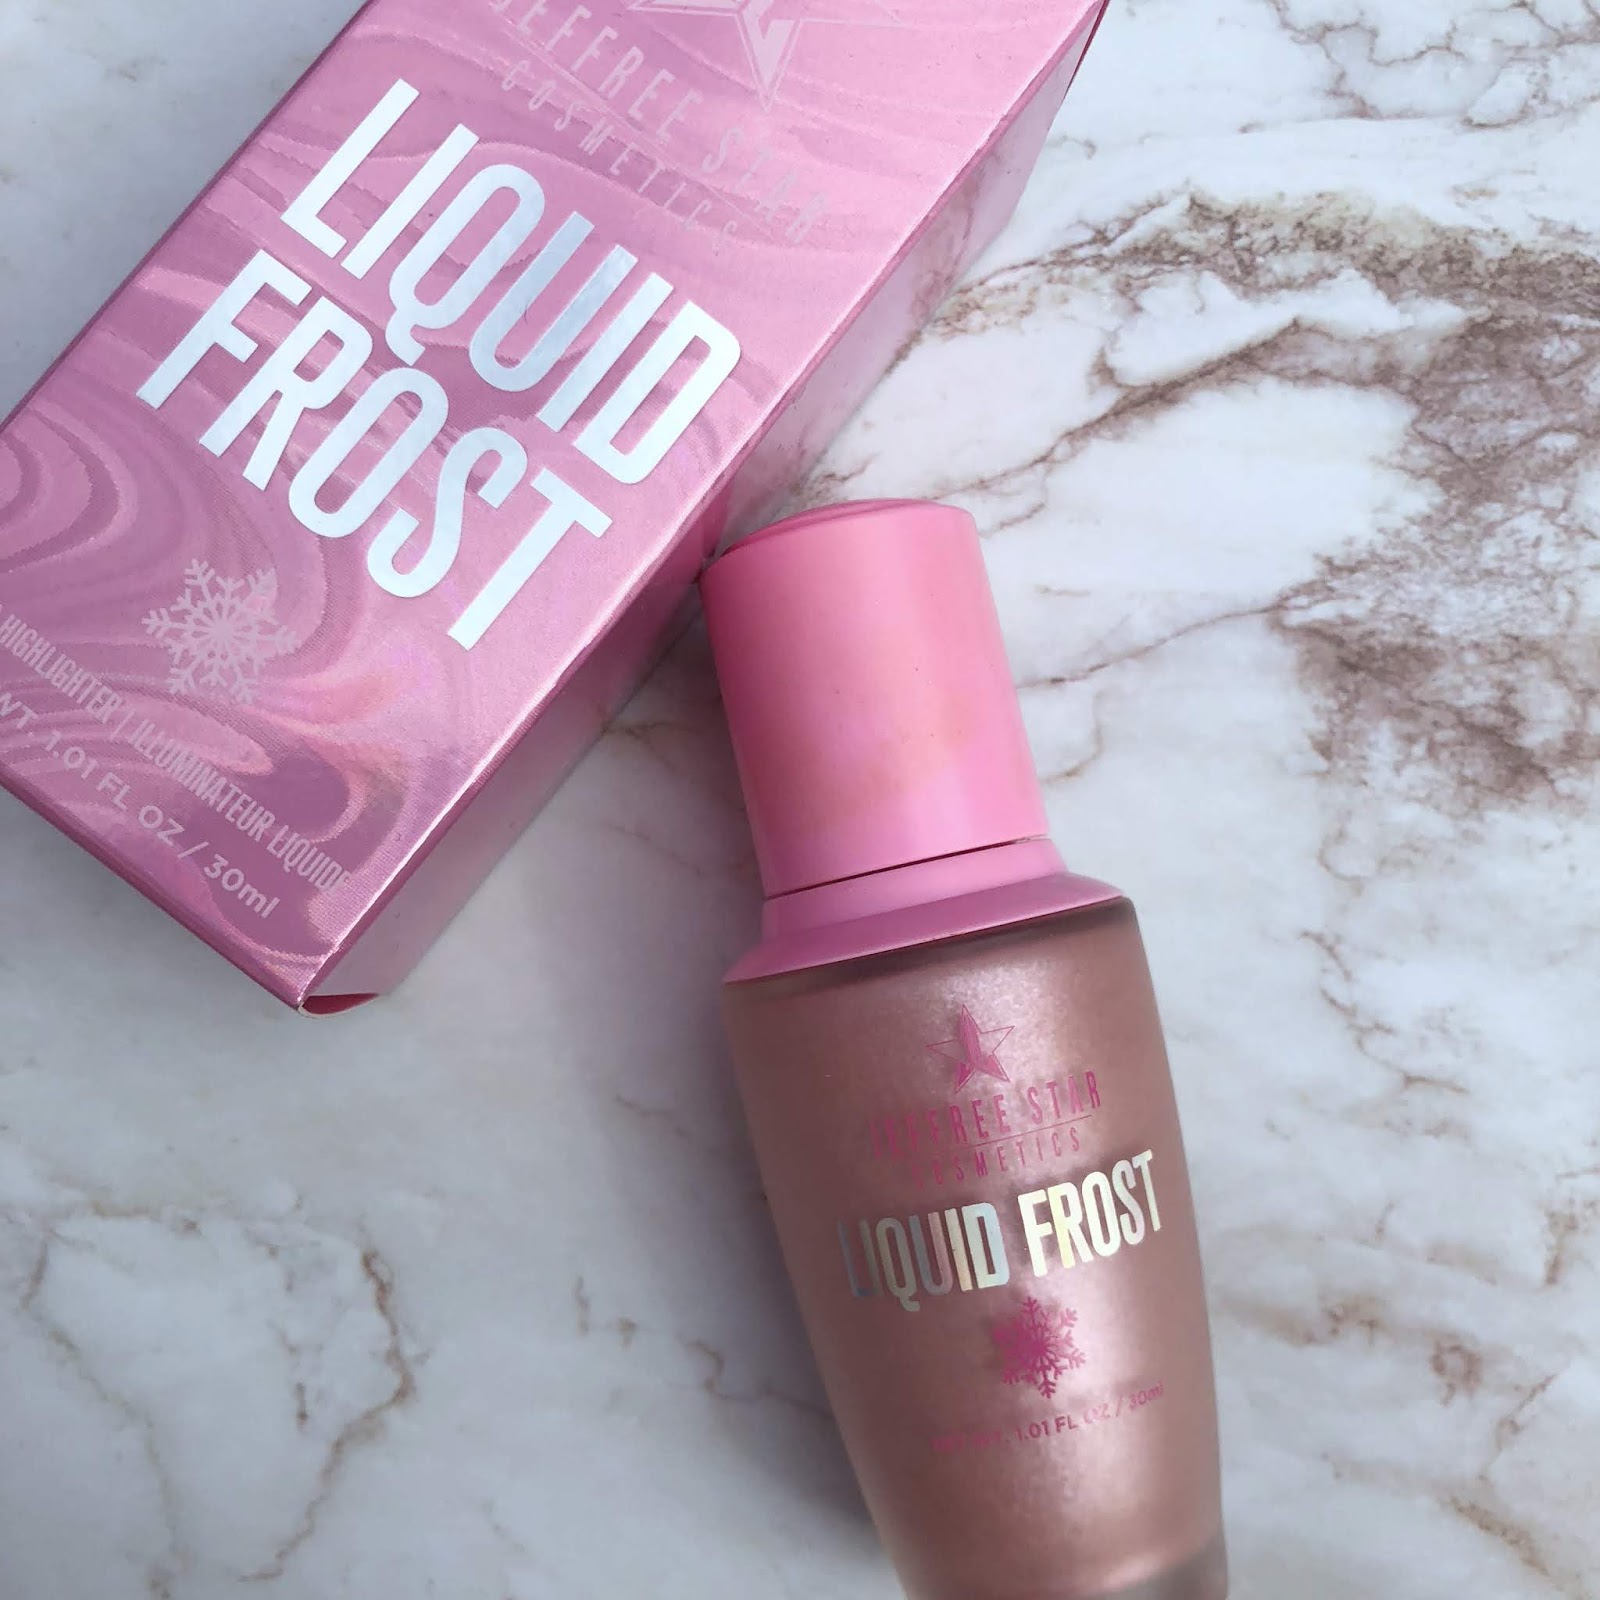
This liquid frost in Ice Queen was my first ever purchase from Jeffree Star! When I saw the initial swatches that were released, I knew I had to try liquid frost. Simply because I'm obsessed with pink/blue/unicorn-y coloured highlights. I purchased mine from Beauty Bay, here!
There are 8 shades in the Liquid Frost (LF) range, and I decided after looking at all the swatches, that I'd be most interested in the 'Ice Queen' shade, because it had pink glitter in it lols.
So here's what it looks like out of the bottle, one drop:

& at first it looks like one of them products where you only need a small amount!
Here's it blended out:

& here's the shade under the sun!

It's very hard to capture the glitter in the product, but I think I managed to in this picture..

Overall, it's a VERY pretty shade, and I guess it's what I was looking for.
But let's talk about the application on the face.
So I've been using this for a few weeks now & I was really excited to put a review out about how pretty and perfect this highlighter is, but I ran into a few difficulties.
Application
It's a liquid highlight. It's not the easiest to blend on the face, understandable. I initially thought my fingers would be the best way to apply this product. Yeah it worked, but it kind of didn't look as pretty as I wanted it to. :/
I then went on to try numerous brushes. I tried concealer brushes mainly & again, I didn't get the best result.
The absolute best way to apply this highlighter with was of course a beauty blender. It worked really nicely, however it just didn't seem to still give me the pinky 'wow' glow I was looking for.
My overall thoughts are: it's not what I was expecting. This highlighter is more subtle than I thought it would ever actually be! Which is kind of a good thing, because you can wear it everyday! But even when built up, I didn't get the result I wanted to! :(
This brings me back to my initial impression - I thought a little would go a long way with this product, but I found myself building it up each time, maybe 3 or 4 layers of it to give me a 'perfect' glow.
The creamy white based highlighter basically dries clear, leaving a subtle pink sheen with some glitter particles in it & it's not as vibrant as it looks straight out the bottle. Again, this may be a really good thing for people who like a subtle glow!
One thing I should add is that it definitely looks very different in different lighting. In some lighting, it doesn't look very pink, but when there's a very bright light around.. say the tube.. it's very pink/purple!
Here's some pictures of me wearing it, sorry about the extreme close ups!


These pictures were with about 3-4 layers with a beauty blender. I do really like the pink glow it gives, it just really wasn't what I expected from the product!
For reference, I have swatched some of my pink/blue unicorny highlighters against this Jeffree Star highlight, to show you the difference!

& this is a picture of them with flash.

As you can see, the Jeffree Star LF is the most subtle out of all of them! My two favourites are the CP over the moon supershock highlighter, as it's really easy to use and looks BEAUTIFUL, & the Mother of pearl highlighter by Topshop which is a dry highlighter. The Topshop mother of pearl is the highlighter that most people stop me about.. blog post about it here.
My least favourite is the Cover FX highlighter as there's no actual glitter particles in it lol.
Overall, I'm not entirely against this product, it's just not what I expected. When you think Jeffree Star, you think of the most OTT highlighter ever, and this was just not it! Like I've said before, that's not necessarily a bad thing, as this highlight is super wearable on an everyday basis, and I'll still wear it!
Let me know if you've tried any of the shades!
Subscribe to:
Posts (Atom)